47843502

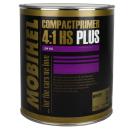
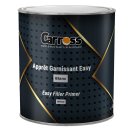
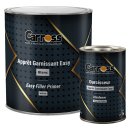
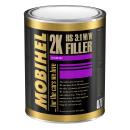
2K primer 3:1
wet on wet 0.75L

Bodywork primer is the invisible layer that determines how well the entire paint finish will hold up: choosing it carefully and applying it correctly is what ensures a long-lasting result.
In the workshop, when paint blisters, becomes chalky or peels off a few months after a repair, the blame is often placed on the topcoat or clearcoat. Nine times out of ten, the fault was already present beneath the paint: the wrong type of primer, a botched drying process, or a skipped sanding step. This guide provides a comprehensive overview of bodywork primers — their roles, types, selection and application — so that, just like at the Carross workshop, you can choose the right product first time round and ensure the paint lasts.
The tip that makes all the difference: Don’t try to fill the surface in a single coat
A filling primer should not be applied at maximum build-up from the very first coat. Trying to ‘fill’ too quickly significantly increases the risk of sagging, poor through-drying and trapped solvents.
The correct approach is to build up the build-up gradually: an initial bonding coat, followed by one or two heavier coats. This method improves adhesion, minimises defects and ensures more even sanding.
Refer to the technical data sheet for the recommended number of coats and thickness.
Bodywork primer is the intermediate layer between the substrate and the paint. It provides adhesion, insulates, protects the metal and fills micro-defects. The type of primer is chosen according to the substrate and the defect to be treated: epoxy on bare metal, a filling primer to level the surface, wet-on-wet for speed, or a special plastic primer for bumpers. This is the assessment framework applied by the bodywork team before any work begins.
A primer is not simply a decorative undercoat: it fulfils three distinct technical functions, and it is by confusing these that one ends up choosing the wrong product.
The first is adhesion. Paint applied directly to sheet metal, putty sanded or an old finish will not adhere permanently. The primer creates the mechanical and chemical bond between this difficult substrate and the topcoat that follows. It is the primer that ‘bridges the gap’ between two materials which, on their own, would not hold together.
The second essential function of the primer is to protect and insulate the surface.
On bare metal, it acts as a barrier against moisture and helps prevent corrosion. This is essential on sheet metal that has been stripped bare after sanding or stripping.
On an unknown or sensitive surface, such as old paint of uncertain composition or a weakened clearcoat, the primer acts as an insulating layer. It prevents the solvents in the new coats of paint from penetrating and reactivating the substrate, thereby avoiding defects such as curling, bleeding or flaking.
The third function is filling. Some primers are formulated to fill in sanding scratches, traces of putty and small irregularities, in order to provide the topcoat with a perfectly smooth base. A topcoat, especially a gloss finish, does not hide anything: on the contrary, it reveals even the slightest flaw in the substrate. A single product does not always fulfil all three of these functions to the same degree: this is precisely why there are several product ranges, each designed for a specific purpose. Choosing a primer means first identifying which of these three functions is most important for your project.
Understanding these categories means understanding why you cannot simply choose ‘any primer’ at random. Each is designed for a specific substrate and purpose.
Epoxy primer is the ultimate protective primer for bare metal. With excellent adhesion to steel and very good corrosion resistance, it provides a hard, stable base. It is used as soon as the metal has been exposed, often even before putty, because it seals the metal against moisture and provides a sound base for all subsequent layers. The downside is that it offers little filling power and generally takes longer to dry than other types. This is the primer to choose when the priority is corrosion protection, not levelling the surface.
The 2K filling primer is the workshop’s real workhorse. Thanks to its high filling power, it fills in sanding scratches (P150 to P240, or even P320 for the final finish) and minor surface imperfections to create an even base.
It is applied in several coats to a puttyed or rough-sanded surface; then, once completely dry, it is gradually sanded down to achieve a perfectly smooth and uniform surface. It is this primer that determines the final flatness: the colour and clearcoat will simply reveal the work carried out underneath.
To find out exactly when to use it and what thickness to aim for, see our dedicated guide: when to use a filling primer.
A wet-on-wet (non-filling)primer can be covered with paint without any intermediate sanding, after a short flash-off time. This saves a considerable amount of time on surfaces that are already sound and smooth, typically a clean repair where the aim is to ensure adhesion and insulation rather than filling. This is the method of choice for jobs where the substrate is already sound and where you want to move straight on to the next stage without having to go back to the sanding stage. However, it does not fill any gaps: the substrate must already be flawless, as any defect remaining beneath this coat will show through the paint.
The special plastic primer addresses the fact that bumpers and flexible components do not hold paint as well as sheet metal. An adhesion promoter (plastic primer) or a primer formulated for these substrates is applied, sometimes combined with a plasticising additive in the paint system. Without it, the paint will flake off at the first sign of stone chip damage: on a flexible component, the flexibility of the film is just as important as the adhesion, as a coat that is too rigid will crack where the plastic flexes.
UV primers and quick-drying sprays are used to cover small areas and localised defects. A UV primer cures in a matter of seconds to a few minutes when exposed to a suitable UV lamp, which significantly speeds up localised repairs and spot-repair work; a filling or covering spray allows a defect to be treated without taking out the spray gun or preparing a mixture. Ideal for a chip, a small touch-up or a one-off repair, without having to mobilise the entire paint shop or carry out a full preparation process for just a few square centimetres.
The designation 1K or 2K appears on all product data sheets and directly determines the result. A 1K primer is ready to use, without a hardener: practical and quick, it is suitable for touch-ups, small areas and spray cans, but offers more limited mechanical and chemical resistance, particularly against the solvents in paint coats.
A 2K primer, on the other hand, is mixed with a hardener just before application: it undergoes a chemical cross-linking reaction, forming a hard, filling and durable film. This is what makes it the standard for serious and long-lasting repairs.
However, with 2K, it is essential to adhere to the specified mixing ratio and the pot life: once this time has elapsed, the product begins to set in the container, becomes more difficult to apply and may result in defects relating to tension or drying.
At Carross, the approach is simple: we reserve 1K for small areas and quick repairs, and switch to 2K as soon as a solid, durable base is required. Choosing the wrong category means either over-working a minor touch up or, more problematically, applying a base coat that is too fragile beneath a paint finish intended to last.
With difficult-to-cover colours — bright reds, yellows, certain vivid colours — the standard grey base coat requires multiple layers of colour to achieve full opacity, which wastes product and prolongs the job. Tinting the primer to a shade close to the topcoat, or to the grey base recommended in the colour chart, reduces the number of coats required and ensures full opacity.
This is a good habit that saves both product and time on large surfaces, provided you stay within the range of primer colours permitted by the paint system being used. The right primer cannot be improvised: it is often specified in the colour chart for the desired finish, and adhering to this is as much a part of the preparation work as sanding.
First and foremost, the surface must be clean, degreased and completely dry: a primer applied to a greasy or damp surface will not adhere, regardless of its quality. Thorough degreasing and dust removal immediately before application prevent fingerprints, streaks and inclusions. This step forms part of a wider preparation process, detailed in our guide to preparing a car body before painting.
The primer is then applied in even coats, building up the thickness in a pyramid shape and following the manufacturer’s recommendations. If applied too thickly, it will run and dry unevenly, trapping the solvents; if it is too thin, it will not fill or protect properly and will allow the substrate to show through. Between coats, allow the flash-off time specified in the technical data sheet: shortening this time will trap solvents beneath the next coat.
Full curing depends on the product type and the workshop temperature: fast drying for UV curing under a lamp, longer for an epoxy. A workshop that is too cold will always extend these times, so the technical data sheet takes precedence over any rules you may have memorised. For filling primers, the next step is sanding – either dry or wet, depending on workshop practice – using P400 to P800 grit depending on the desired finish beneath the paint. Work is carried out in stages, without ever skipping more than one grit, to remove the scratches from the previous grit without creating deeper ones. The entire surface is matted down: any area that remains glossy is an area where the paint will not adhere properly.
This question comes up often, driven by the desire to work more quickly. The answer depends on the condition of the substrate. On a surface that has already been primed or painted, is sound and has simply been matted down, it is possible to touch up the paint without reapplying primer: the existing layer already serves to provide adhesion and insulation.
But as soon as the surface is altered — bare metal, fresh putty, untreated plastic — skipping the primer is tantamount to dooming the finish: poor adhesion, corrosion flaring up beneath the paint, and flaking at the first impact. In such cases, primer is not an option but a necessary step. Trying to skip it on these surfaces merely postpones the problem for a few months and guarantees you’ll have to redo the whole job. The right question is therefore not ‘can I do without it?’ but ‘is my surface already protected and providing adequate adhesion or not?’.
Leaving a filling primer untreated without sanding it down is tantamount to retaining the defects it was meant to correct, and providing the paint with an unmatte surface – thus resulting in a double failure in terms of adhesion and smoothness. Painting too soon, on a filler that is not dry through to the core, traps the solvents, which then rise to the surface as blisters and crazing. Applying a filler directly onto bare metal, without an epoxy primer underneath, deprives the repair of its anti-corrosion barrier and allows moisture to work its way under the paint. Confusing ‘wet-on-wet’ with filler leads to using a product that does not fill any gaps on a surface full of defects, which will immediately become apparent. Finally, omitting the primer on plastic guarantees flaking at the first sign of stone chips, and skipping grit sizes when sanding leaves deep scratches that show through the paintwork.
• Bare metal surface: opt for an epoxy primer for adhesion and corrosion protection before proceeding
• Puttyed or uneven surface: use a 2K primer to fill the surface, then sand it smooth
• Sound, already smooth surface: apply wet-on-wet to save time without the need for intermediate sanding
• Bumpers and flexible parts: a special plastic primer for flexibility and adhesion
• Small, localised touch-ups: use a filling spray or UV-curing spray to treat the area without a spray gun
• Difficult-to-cover colour: use a tinted primer as recommended to reduce the number of coats
• When a durable base coat is required: opt for 2K rather than 1K whenever a proper repair is needed
• Choosing the right putty beforehand: refer to the guide on which putty to choose
• Carross’s advice: assess the substrate and the defect before selecting the product: it’s the combination that matters, never just habit
Putty is applied before the filling primer: you repair the surface, sand down the putty, then the primer evens out the surface and fills in any remaining scratches before painting. On bare metal, many workshops first apply an epoxy to protect the sheet metal, then the putty, followed by the filling primer. In all cases, the topcoat primer is applied after the putty has been applied: this is what provides the final flat finish.
This depends on the type of primer and the workshop temperature; there is no universal timeframe. A 2K filler needs to be completely dry before sanding and then painting; a UV primer is ready in a few minutes after curing under a lamp; and a wet-on-wet application can be recoated after a short air-drying period. Always refer to the product’s technical data sheet, which gives the exact times depending on the temperature.
On a surface that has already been primed or previously painted and simply matted down, a touch-up is possible without reapplying primer. But on bare metal, fresh putty or plastic, painting without primer will compromise the finish: poor adhesion, corrosion, flaking. As soon as the surface is altered in any way, it is essential to prime it.
Start with the surface and the defect: epoxy to protect bare metal, 2K filler to fill and level the surface, wet-on-wet for a quick job on sound surfaces, special plastic primer on bumpers, and spray or UV-curing primer for small touch-ups. It’s the combination of substrate and defect that determines the choice, never habit alone.
Updated: 30/09/2026
Check out our bodywork guides and tutorials. The Carross Tech’Team: +33 (0)1 60 27 20 19.