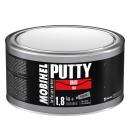
40090203

Universal Soft Putty
SMART Tec 1.8kg

The right putty isn’t the one that promises to do everything: it’s the one that’s suited to the defect, the surface and the repair to be carried out.
Fibre-reinforced putty, finishing putty, lightweight putty, putty for plastic, aluminium putty or sprayable putty: each product has its own characteristics and area of application. Some may overlap in application, but they are not interchangeable in all situations. A poor choice, inadequate preparation or applying the putty too thickly can lead to bubbles, shrinkage, poor adhesion or cracks in the short or long term.
In keeping with the Carross method, this guide reviews the main bodywork putties used in car bodywork to help you choose the right product right from the start, but also to understand why several putties are sometimes used in succession. For repairs involving filling a hole or a puncture, please also see our answers to frequently asked questions on the use of putty.
The tip that makes all the difference: Apply the putty as closely as possible
Apply the putty aiming for the final shape right from the start, with an even thickness and gradually tapered edges. Avoid creating large excess thicknesses, or ‘ridges’, which would require more sanding and could result in dents, ripples or deep scratches.
This makes sanding quicker, easier to control and more precise. In bodywork, the best sanding is often the sanding you’ve avoided by applying the putty correctly.
Bodywork putty corrects scratches, minor dents and imperfections in shape that remain after straightening, before the primer is applied. The choice always depends on the defect to be repaired, the substrate and the depth to be filled: fibre-reinforced putty is used for missing or deeper areas, finishing or lightweight putty to smooth out irregularities, and flexible putty for compatible plastics.
To avoid bubbles, shrinkage or cracks, the substrate must be properly prepared, the correct mix ratio observed, and the product applied within the limits specified in its technical data sheet. Once fully cured, the putty is gradually sanded down until a flat, even surface is achieved, ready for priming.
Bodywork putty is used to correct the surface shape after a panel has been straightened. Even after careful work with a hammer, a hammer block or a nail puller, there may still be dents, ripples or small irregularities that panel beating does not always manage to remove completely. Putty is then used to fill these residual defects, after which it is sanded down to restore a flat, even surface that matches the original contour.
Putty is neither an insulator nor a form of anti-corrosion protection. On sheet metal that has been poorly prepared or left unprotected, moisture can seep in and encourage the formation of rust beneath or around the putty. The product must therefore only be applied to a sound, clean and properly prepared substrate, followed by the application of a suitable protective coating before applying the putty. Only certain putties specially formulated with anti-corrosion properties can offer additional protection; however, this does not exempt the user from following the manufacturer’s recommendations.
It is important to understand that putty does not paint or protect: it simply levels the surface. It is a shaping product, not a finish or a sealant. Underneath, the aim is to have sound, straightened sheet metal; on top, a primer is required to insulate and create a uniform surface prior to painting, as detailed in the section on bodywork primer application.
Putty should only be used to correct any remaining imperfections. Attempting to conceal poor panel straightening under an excessively thick layer increases the risk of shrinkage, cracking and visible imperfections when viewed under low-angle light. To achieve a durable repair, you must first straighten the panel as best as possible, apply the putty within the limits specified in its technical data sheet, and then check the flatness before applying the primer.
Fibre-reinforced putty is reinforced by fibres incorporated into its formulation. These are often fiberglass fibres, but some products may also contain carbon fibres, mineral fibres or other specific materials. These reinforcements improve the putty’s mechanical strength and enable it to locally rebuild the material or bridge small holes, provided the substrate has been properly prepared. It is suitable for significant defects and repairs requiring a certain thickness, but generally needs to be applied in several layers rather than in a single, overly thick coat. As it is more difficult to sand and leaves a rough surface, it is subsequently covered with a finishing putty or ‘light’ putty.
Finishing putty has a fine, even texture. It is used to correct scratches, small dents and sanding marks, particularly after using a fibre-reinforced or filling putty. Easy to sand, it produces a uniform surface before the primer is applied.
Light-weight putty, made lighter by microspheres or specific fillers, is particularly easy to apply and sand. Its low density makes it practical for finishing large surfaces. It minimises sanding effort and is comfortable to use, provided the thicknesses and drying times recommended by the manufacturer are followed.
Flexible putty for plastic is formulated to accommodate the deformation of bumpers and other plastic components. More flexible than traditional putty, it reduces the risk of cracking on substrates subject to impact and movement. However, the plastic must be properly cleaned, degreased and prepared in accordance with the manufacturer’s recommendations.
Aluminium-filled putty contains metal particles which give it good heat resistance and dimensional stability. It is suitable for certain areas subject to temperature fluctuations or vibrations. However, it should not be chosen solely for its metallic appearance: the operating temperature and compatibility with the substrate must be checked.
Sprayable putty is a polyester putty designed to be applied by spray gun using the appropriate equipment and nozzle. It allows large areas to be covered quickly and helps to smooth out irregularities or sanding marks. It can then be sanded like a conventional putty, but it is no substitute for proper straightening or a primer when defects are significant.
Finally, multi-surface or all-purpose putties may be suitable for a range of materials in routine repairs. They are practical, but on a demanding job site, a specialised putty remains preferable to ensure the adhesion, flexibility and durability of the repair.
The choice of putty depends as much on the surface as on the depth and nature of the defect. On sound, degreased and properly sanded steel sheet metal, a standard polyester putty is generally suitable for filling dents, scratches and dents. To rebuild a larger area, a fibre-reinforced putty can be used, followed by a finishing putty to achieve a perfectly smooth surface.
On aluminium and galvanised sheet metal, it is best to use a product specifically recommended for these substrates, such as an aluminium-filled putty or a putty that adheres well to non-ferrous metals. Proper preparation remains essential: degreasing, appropriate sanding and dust removal. A standard polyester filler applied to a poorly prepared surface may lose its adhesion and peel off over time.
For plastic bumpers, the putty must be sufficiently flexible to accommodate the part’s deformation without cracking. On plastics that are difficult to bond, particularly polypropylene (PP) or polyethylene (PE), a compatible putty must be used and, if necessary, a plastic adhesion promoter should be applied beforehand. A rigid putty on a flexible part is likely to crack at the first sign of flexing.
Finally, on old paint or primer, the putty must never be applied to a glossy, brittle or poorly adhering surface. First, check the condition of the coating, remove any flaking areas, then sand sufficiently to achieve a sound, clean and matt surface. Depending on the product and the substrate, it may be necessary to strip the surface back to bare metal. In all cases, the manufacturer’s technical data sheet remains the reference for checking the putty’s compatibility with the substrate.
The choice of putty depends primarily on the amount of material that needs to be replaced. For a deep defect or a partially reconstructed area, start with a fibre-reinforced putty, capable of adding volume and withstanding the required thicknesses. Once this base has been sanded and reshaped, apply a finishing or ‘light’ putty to remove sanding marks, pores and any remaining irregularities.
For superficial scratches or minor defects, a finishing or ‘multi’ putty may suffice. However, it should not be used as a substitute for a filler: if applied too thickly, it may shrink or crack.
In bodywork, several types of putty are therefore often used in succession. The first restores the shape, whilst the second performs preparation work prior to applying the primer. This step-by-step approach allows for faster work and a more durable repair. However, preparing the substrate remains essential: it must be sound, dry, clean and sufficiently sanded to ensure the system adheres properly. This is part of the overall preparation process described in ‘Preparing a body panel before painting’.
Putty sets quickly: once the hardener has been mixed in, the working time is short. The hardener must be measured out precisely — if too little is used, the putty will not set and will remain sticky; if too much is used, it will become brittle and turn yellow. The exact ratio depends on the product and the temperature, but generally the hardener ratio is 2 per cent; always follow the recommendations on the product data sheet. Mix on a clean surface without incorporating air, using folding movements rather than whisking, then apply in thin, firm layers with a stirring stick.
Removing air bubbles is as much about the application as it is about the mixing: press the stirring stick down to flatten the product onto the surface rather than simply depositing it, which expels any air trapped beneath the material. It is better to apply several thin layers than a single thick layer: this minimises shrinkage and air pockets. Allow the putty to set fully before sanding, as sanding it too early clogs the sandpaper and causes the putty to shift.
Once set, the putty is dry-sanded using sanding blocks to ensure a flat finish. Start with a medium-grit to level the surface, then refine in successive stages without ever skipping more than one grit – typically P120, P180, P240 up to the target finishing grit before priming. Skipping a grit leaves scratches that the next grit cannot smooth out, and these will show through the paint. Never paint directly onto bare putty: it remains porous and must be covered with a primer to seal and even out the surface.
• Deep defects or reconstruction: fibre-reinforced putty for the base layer, followed by a finish
• Scratches and small dents: putty or ‘light’ putty on its own
• Large areas to be smoothed: putty, which does not shrink and is easy to sand
• Flexible substrate (bumpers): flexible plastic putty is essential
• Aluminium, galvanised steel or high-temperature areas: aluminium-filled putty for durability
• Delicate substrates, insulating base: epoxy putty for adhesion
• Multi-material repairs: multi-surface putty, if no specialist product is available
• Carross’s recommendation: if in doubt between two product ranges, always prioritise substrate compatibility over ease of application
They are not used for the same purposes. Bodywork putty fills gaps and can be sanded down ready for painting: it is rigid and designed for surface repairs. Silicone is a flexible sealant that cannot be sanded and does not take paint properly. Use putty to fill gaps and perform preparation before painting; use silicone to seal a joint.
For a repair that needs to be sanded and then painted, always use putty: it is the only product that levels out and can be primed and painted over. Silicone is only suitable for sealing a joint; it must never be used under paint, as it causes the paint film to peel and creates pitting. Never confuse the two functions on the same job. At Carross, we recommend deciding straight away at the assessment stage: repairs to be painted → putty; joints to be sealed → silicone.
When fresh, before it hardens, putty can be wiped off with a stirring stick and then a cloth whilst it is still workable. Scrape off any excess onto the work surface and clean the tools before it starts to set, as once it has hardened, it can only be removed by sanding. A tool left with putty on it becomes impossible to clean properly.
Once dry, putty does not dissolve in solvent: it must be removed by sanding or mechanical scraping. On an area requiring rework, sand down until you reach sound substrate before reapplying filler, taking care not to skip any grit sizes to avoid leaving scratches. For a fine burr, a wedge and medium-grade abrasive are sufficient to remove it.
Prepare the surface (clean, dry, sanded), mix in the hardener at the ratio indicated on the product information sheet, mix thoroughly to remove any air bubbles, and apply in thin layers within the working time. Once set, sand smooth in stages using progressively finer grit, then apply a primer. Multi-surface filler works in the same way as a conventional putty, with the added advantage of adhering to a variety of materials.
Updated: 30/09/2026
Check out our bodywork guides and tutorials. The Carross Tech’Team: +33 (0)1 60 27 20 19.