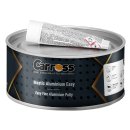
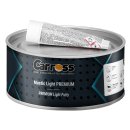
Common questions about using putty in bodywork :
See the products concernedHow do I choose the right putty?
Putty is a paste used to repair, fill and smooth imperfections on a vehicle's bodywork before it is painted. It can be used to repair dents, scratches, holes or chips in sheet metal or plastic. This product evens out the surface to be applied so that it is perfectly smooth before the next stages of repair, and provides a high level of protection. It is generally made up of synthetic resins mixed with a Hardener (catalyst). The Hardener causes polymerisation, meaning that the Putty hardens quickly after application.
There are different types of putty used in car bodywork:
1- Polyester putty :
The most common in car bodywork, it is easy to sand, easy to use and dries quickly and adheres well to the sheet metal.
2- Epoxy putty :
This type of professional product is ideal and more resistant to corrosion, often used on specific metal substrates.
3- Finishing putty:
Putty suitable for superficial Touch up. This is a thinner type of putty.
How do I apply putty for car bodywork?
Applying bodywork putty is a key stage in achieving a smooth surface ready for repainting. Here are the different steps to follow to ensure excellent finishing results on your bodywork surface:
1- Surface Preparation :
a) Clean the area and prepare the surface:
Remove any dust, grease, rust or old paint around the area to be repaired.
b) Sand the surface:
Use abrasive paper to sand the damaged area and ensure the putty adheres well.
c) Degrease the bodywork:
Wipe with a Degreaser to remove any marks and ensure your car body surface is thoroughly clean to ensure high-quality results.
2- Putty preparation :
a) Mixing putty and Hardener :
On a Putty wedge, place the recommended quantity of Putty and add the small quantity of Hardener in the recommended proportions (generally, you only need to add 2 to 3%).
b) Mix the Hardener:
Use a mixing spatula to homogenise properly until you obtain a uniform colour.
3- Applying the Putty to the surface:
a) Spread the mixture over the surface to be filled:
Using a spatula, apply a thin, even layer to the appropriate area.
b) Fill the hollows:
Start gently by filling holes and bumps with Putty, extending slightly beyond the surface.
c) Smooth the surface:
Try to smooth the surface as much as possible to reduce sanding after drying.
4- Drying time :
a) Allow to harden:
Drying time varies according to temperature, type of Putty and amount of Hardener.
b) Avoid humidity:
Putty should be dried in a dry place.
5- Sanding and finishing :
a) Sanding the Putty:
Once dry, sand with medium-grit sandpaper to even out the surface.
b) Reapply putty if necessary:
If the surface is not completely smooth or imperfections remain, apply a second thin layer.
c) Final sanding:
Then sand with a finer grain to prepare the surface for Paint.
How do I get a smooth finish?
For the bodybuilder to achieve a smooth, even surface, the first step is to prepare the substrate properly. The surface must be perfectly sanded and free of all traces of rust, paint, silicone or contaminants. The choice of putty is an important step and must be adapted to the type of repair or Touch up you need to carry out on your vehicle.
A standard Universal putty for general repairs, a finishing putty for micro-defects or a Fiberglass putty for areas that are subject to greater stress. The mixture with its Hardener must be precise, homogeneous and carried out in the proportions recommended by the manufacturer. Too rapid a catalysis, linked to an excess of Hardener, can lead to problems of shrinkage or cracking.
Thin layers should be applied using a clean, flexible spatula.
In a professional body shop, a smooth finish is never the result of chance. It's the result of a rigorous sequence of technical gestures and a judicious choice of product. It's this level of rigour that makes all the difference between an ordinary repair and a top-quality job.
How long does putty take to dry?
The drying time for bodywork putty depends on a number of factors, but in general it varies from 15 to 30 minutes. We recommend that you always refer to the manufacturer's technical data sheet for exact drying times and conditions.
Is it possible to putty over primer?
Yes, it is possible to putty over primer, but only in certain specific cases and under certain conditions. This is not the generally recommended method, but it can be considered in specific contexts.
You can apply putty over primer for light repairs or Touch up, after first sanding the primer. When using finishing putty to correct micro-defects or small irregularities (fine scratches, slight indentations visible after the Dry Guide Coat).
Be aware of the various conditions to be taken into account if you wish to use primer:
- The primer must be perfectly dry (fully cured) and well sanded.
- Do not use polyester putty on an unsanded primer, as this may result in poor adhesion.
- The primer used must be compatible with the application of putty over it. Some insulating or epoxy primers do not allow the putty to adhere.
We recommend that you always use primer on top to create a mechanical bond. What's more, we prefer to apply the Putty directly to the bare metal sheet or to an already sanded Putty for optimum adhesion and to avoid delamination.
What are the mistakes to avoid when using Putty?
Here are the main mistakes to avoid when using Putty on your vehicle:
1- Preparing the surface incorrectly:
Preparing your application surface correctly is essential for better adhesion. Applying Putty to a dirty, greasy, rusty or badly sanded surface will prevent it from adhering properly, and there is a risk of delamination or cracks.
2- Incorrect dosage of Hardener:
If you use too much Hardener, the surface is likely to dry too quickly, resulting in poor adhesion over time. On the other hand, if you don't use enough Hardener, it won't cure completely. We recommend that you stick to the dosage given on the manufacturer's data sheet, which is generally 2 to 3%.
3- Mixing the putty incorrectly:
Inconsistent mixing creates areas that harden poorly, and mixing too vigorously risks forming bubbles and holes.
4- Apply the Putty too thickly:
Applying a thick layer all at once, especially to a large surface or cavity, can cause polymerisation shrinkage or cracks. It can also lengthen drying time and complicate the sanding process.
5- Sanding the putty too soon:
If you sand when the Putty hasn't fully cured, it runs the risk of tearing off and clogging up in the sandpaper. A word of advice: always wait for it to harden completely.
6- Don't check the Dry Guide Coat:
If you don't use a Dry Guide Coat, you run the risk of missing small indentations or bumps that are invisible to the naked eye. This repair phase is essential to ensure that the results meet your expectations.
What are the main characteristics of bodywork putty?
1. Excellent filling power :
This allows Putty to fill in defects such as holes, deep scratches, dents and dings. A putty with a high filling power allows you to make up for major irregularities without having to apply multiple coats.
2. Drying time / hardening :
Drying time varies according to the type of Putty, temperature and quantity of Hardener. Generally, the time varies between 15 and 30 minutes.
3. Easy sanding :
A good putty should remain hard enough to be solid, but soft enough to be easily sanded, without clogging the abrasives. Some putties are specifically formulated for dry or wet sanding.
4. Good in-depth adhesion :
The putty must adhere well to the substrate: bare sheet metal, aluminium, plastic, polyester, Galvanized steel. Some putties are specifically formulated for dry or wet sanding.
5. Composition/materials :
The most common is two-component polyester putty, but there are many other putties such as Fiberglass, aluminium and finishing putty.
6. Filler content/density:
Putties can be more or less heavy or dense. A light Putty is often easier to sand, but less solid for major repairs. A heavy Putty is more resistant, but more difficult to work with.
7. Thermal resistance :
Some putties are more resistant to ambient heat, which can be useful for exposed areas or in Preparation before going into the cabin.
8. Finish and appearance after sanding :
A good putty provides the bodywork component with a smooth surface, free of pores and bubbles, ready to receive primer or paint. Finishing putties are designed to correct any remaining defects before painting.
How much does bodywork putty cost?
The cost of bodywork putty depends on the size of the area to be repaired, the type of product and the quantity used. The average consumption of polyester putty, for example, is around 1 kg for 1m² of surface in a standard coat. For minor Touch up or imperfections, 100 to 300g is usually sufficient. The price depends on the brand of the product and the features that the brands offer.
What different types of putty does Carross offer?
You'll find our full range of bodywork putties: Universal putty, Metal zinc putty, Fiberglass/resin putty, Sprayable putty, Aluminium putty and Plastic putty. We offer 24-hour delivery in France and 48-hour delivery in Europe. Our products are offered at the best prices to help you keep the cost of your repairs under control.
You'll find all the leading brands on our website: MaxMeyer, Cromax, PPG, Glasurit, Nexa Autocolor, De Beer, Lechler, Lesonal, Carross....


